WebView的简单讲解
来源:互联网 发布:ps此文档包含未知数据 编辑:程序博客网 时间:2024/06/11 14:04
WebView is a view that display web pages inside your application. You can also specify HTML string and can show it inside your application using WebView. WebView makes turns your application to a web application.
In order to add WebView to your application, you have to add <WebView>element to your xml layout file. Its syntax is as follows −
<WebView xmlns:android="http://schemas.android.com/apk/res/android" android:id="@+id/webview" android:layout_width="fill_parent" android:layout_height="fill_parent"/>
In order to use it, you have to get a reference of this view in Java file. To get a reference, create an object of the class WebView. Its syntax is −
WebView browser = (WebView) findViewById(R.id.webview);
In order to load a web url into the WebView, you need to call a methodloadUrl(String url) of the WebView class, specifying the required url. Its syntax is:
browser.loadUrl("http://www.tutorialspoint.com");Apart from just loading url, you can have more control over your WebView by using the methods defined in WebView class. They are listed as follows −
This method specifies the WebView has a back history item.
2canGoForward()This method specifies the WebView has a forward history item.
3clearHistory()This method will clear the WebView forward and backward history.
4destroy()This method destroy the internal state of WebView.
5findAllAsync(String find)This method find all instances of string and highlight them.
6getProgress()This method gets the progress of the current page.
7getTitle()This method return the title of the current page.
8getUrl()This method return the url of the current page.
If you click on any link inside the webpage of the WebView , that page will not be loaded inside your WebView. In order to do that you need to extend your class from WebViewClient and override its method. Its syntax is −
private class MyBrowser extends WebViewClient { @Override public boolean shouldOverrideUrlLoading(WebView view, String url) { view.loadUrl(url); return true; }}
Example
Here is an example demonstrating the use of WebView Layout. It creates a basic web application that will ask you to specify a url and will load this url website in the WebView.
To experiment with this example, you need to run this on an actual device on which internet is running.
Following is the content of the modified main activity filesrc/MainActivity.java.
package com.example.sairamkrishna.myapplication;import android.app.Activity;import android.os.Bundle;import android.view.Menu;import android.view.MenuItem;import android.view.View;import android.webkit.WebView;import android.webkit.WebViewClient;import android.widget.Button;import android.widget.EditText;import android.widget.TextView;import android.widget.Toast;import java.io.FileInputStream;import java.io.FileOutputStream;public class MainActivity extends Activity { Button b1; EditText ed1; private WebView wv1; @Override protected void onCreate(Bundle savedInstanceState) { super.onCreate(savedInstanceState); setContentView(R.layout.activity_main); b1=(Button)findViewById(R.id.button); ed1=(EditText)findViewById(R.id.editText); wv1=(WebView)findViewById(R.id.webView); wv1.setWebViewClient(new MyBrowser()); b1.setOnClickListener(new View.OnClickListener() { @Override public void onClick(View v) { String url = ed1.getText().toString(); wv1.getSettings().setLoadsImagesAutomatically(true); wv1.getSettings().setJavaScriptEnabled(true); wv1.setScrollBarStyle(View.SCROLLBARS_INSIDE_OVERLAY); wv1.loadUrl(url); } }); } private class MyBrowser extends WebViewClient { @Override public boolean shouldOverrideUrlLoading(WebView view, String url) { view.loadUrl(url); return true; } } @Override public boolean onCreateOptionsMenu(Menu menu) { // Inflate the menu; this adds items to the action bar if it is present. getMenuInflater().inflate(R.menu.menu_main, menu); return true; } @Override public boolean onOptionsItemSelected(MenuItem item) { // Handle action bar item clicks here. The action bar will // automatically handle clicks on the Home/Up button, so long // as you specify a parent activity in AndroidManifest.xml. int id = item.getItemId(); //noinspection SimplifiableIfStatement if (id == R.id.action_settings) { return true; } return super.onOptionsItemSelected(item); }}
Following is the modified content of the xml res/layout/activity_main.xml.
<RelativeLayout xmlns:android="http://schemas.android.com/apk/res/android" xmlns:tools="http://schemas.android.com/tools" android:layout_width="match_parent" android:layout_height="match_parent" android:paddingLeft="@dimen/activity_horizontal_margin" android:paddingRight="@dimen/activity_horizontal_margin" android:paddingTop="@dimen/activity_vertical_margin" android:paddingBottom="@dimen/activity_vertical_margin" tools:context=".MainActivity"> <TextView android:text="WebView" android:layout_width="wrap_content" android:layout_height="wrap_content" android:id="@+id/textview" android:textSize="35dp" android:layout_alignParentTop="true" android:layout_centerHorizontal="true" /> <TextView android:layout_width="wrap_content" android:layout_height="wrap_content" android:text="Tutorials point" android:id="@+id/textView" android:layout_below="@+id/textview" android:layout_centerHorizontal="true" android:textColor="#ff7aff24" android:textSize="35dp" /> <EditText android:layout_width="wrap_content" android:layout_height="wrap_content" android:id="@+id/editText" android:hint="Enter Text" android:focusable="true" android:textColorHighlight="#ff7eff15" android:textColorHint="#ffff25e6" android:layout_marginTop="46dp" android:layout_below="@+id/imageView" android:layout_alignParentLeft="true" android:layout_alignParentStart="true" android:layout_alignRight="@+id/imageView" android:layout_alignEnd="@+id/imageView" /> <ImageView android:layout_width="wrap_content" android:layout_height="wrap_content" android:id="@+id/imageView" android:src="@drawable/abc" android:layout_below="@+id/textView" android:layout_centerHorizontal="true" /> <Button android:layout_width="wrap_content" android:layout_height="wrap_content" android:text="Enter" android:id="@+id/button" android:layout_alignTop="@+id/editText" android:layout_toRightOf="@+id/imageView" android:layout_toEndOf="@+id/imageView" /> <WebView android:layout_width="wrap_content" android:layout_height="wrap_content" android:id="@+id/webView" android:layout_below="@+id/button" android:layout_alignParentLeft="true" android:layout_alignParentStart="true" android:layout_alignParentRight="true" android:layout_alignParentEnd="true" android:layout_alignParentBottom="true" /> </RelativeLayout>
Following is the content of the res/values/string.xml.
<resources> <string name="app_name">My Application</string> <string name="hello_world">Hello world!</string> <string name="action_settings">Settings</string></resources>
Following is the content of AndroidManifest.xml file.
<?xml version="1.0" encoding="utf-8"?><manifest xmlns:android="http://schemas.android.com/apk/res/android" package="com.example.sairamkrishna.myapplication" > <uses-permission android:name="android.permission.INTERNET" /> <application android:allowBackup="true" android:icon="@mipmap/ic_launcher" android:label="@string/app_name" android:theme="@style/AppTheme" > <activity android:name=".MainActivity" android:label="@string/app_name" > <intent-filter> <action android:name="android.intent.action.MAIN" /> <category android:name="android.intent.category.LAUNCHER" /> </intent-filter> </activity> </application></manifest>
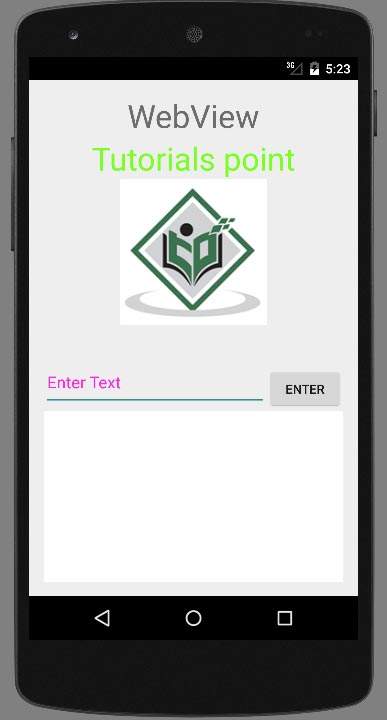
Let's try to run your WebView application. To run the app from Android studio, open one of your project's activity files and click Run  icon from the toolbar. Android studio will display as shown below
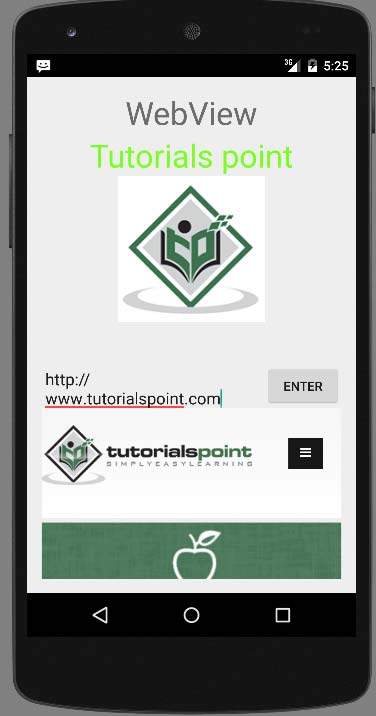
Now just specify a url on the url field and press the browse button that appears,to launch the website. But before that please make sure that you are connected to the internet. After pressing the button, the following screen would appear −
Note. By just changing the url in the url field, your WebView will open your desired website.
点击返回键返回上一个页面,一直到退出app
mWebView.canGoBack();mWebView.canGoForward();mWebView.setWebViewClient(new MyBrowser());
/** * mWebView.goBack(); //后退 mWebView.goForward();//前进 mWebView.reload(); //刷新 */@Overridepublic boolean onKeyDown(int keyCode, KeyEvent event) {if (event.getAction() == KeyEvent.ACTION_DOWN) {if (keyCode == KeyEvent.KEYCODE_BACK && mWebView.canGoBack()) { // 表示按返回键时的操作mWebView.goBack(); // 后退// webview.goForward();//前进return true; // 已处理} else {// 直接退出appSystem.exit(0);}}return false;}- WebView的简单讲解
- WebView的详细讲解
- 安卓WebView与H5互调的简单实现讲解(一)
- 简单webview的使用
- OC 简单的webview
- 简单WebView的使用
- WebView的简单入门
- WebView的简单用法
- WebView的简单使用
- WebView简单的使用
- WebView的简单使用
- WebView的简单使用
- WebView的简单使用
- WebView的简单用法
- WebView的简单用法
- WebView的简单使用
- WebView的简单使用
- WebView的简单使用
- bzoj4394【Usaco2015 Dec】Bessie
- 第2章 基础语法 — 条件语句
- 字符串与整数、浮点数、无符号整数之间的转换常用函数
- 字符串(任意进制)转整型
- Git忽略规则及.gitignore规则不生效的解决办法
- WebView的简单讲解
- JavaScript > 使用JSONP或HttpClient跨域请求
- 设计模式之Builder模式
- MySql导入导出数据库(含远程导入导出)
- Swing Synth L&F
- 207,省市联动效果
- Visual Studio CUDA文件高亮设置 win10+VS2015+CUDA7.5
- 进入保护模式(一)——《x86汇编语言:从实模式到保护模式》读书笔记12
- c语言学习