UITableViewCell
来源:互联网 发布:淘宝为啥不能买彩票了 编辑:程序博客网 时间:2024/06/09 23:04
1 UITableViewCell
2 搭建测试项目
3 实战演练
- UITableViewCellStyle
- UITableViewCellSelectionStyle
- UITableViewCellAccessoryType
- UITableViewCellSeparatorStyle
- 管理内容缩进
- 自定义Cell
1 UITableViewCell
UITableViewCell定义了UITableView显示时的细胞的属性和行为。UITableViewCell提供了相关属性和方法管理cell的背景和内容(text、image、和自定义的view)、选中和高亮的状态、管理附属视图和编辑模式下的视图.
2 搭建测试项目
测试项目的界面可自行搭建,这里使用类YJTableViewCellTVC,为了方便,它继承了UITableViewController。
//// YJTableViewCellTVC.swift// UI//// Created by yangjun on 15/12/15.// Copyright © 2015年 阳君. All rights reserved.//import UIKit/// 样式private enum YJCellStyle : Int { case Style case SelectionStyle case AccessoryType case SeparatorStyle case ManagingContentIndentation case SwitchTableViewCell /// 获取标题 func title() -> String { var title = "" switch self { case .Style, .SelectionStyle, .AccessoryType, .SeparatorStyle: title = "UITableViewCell\(self)" case .ManagingContentIndentation: title = "缩进" case .SwitchTableViewCell: title = "有开关的cell" } return title } init(title: String) { switch title { case YJCellStyle.SelectionStyle.title(): self = YJCellStyle.SelectionStyle case YJCellStyle.AccessoryType.title(): self = YJCellStyle.AccessoryType case YJCellStyle.ManagingContentIndentation.title(): self = YJCellStyle.ManagingContentIndentation case YJCellStyle.SwitchTableViewCell.title(): self = YJCellStyle.SwitchTableViewCell default: self = YJCellStyle.Style } }}/// UITableViewCellclass YJTableViewCellTVC: UITableViewController { // 显示样式 private var cellStyle = YJCellStyle.Style // MARK: - View override func viewDidLoad() { super.viewDidLoad() let nib = UINib(nibName: "YJSwitchTableViewCell", bundle: nil) self.tableView.registerNib(nib, forCellReuseIdentifier: "YJSwitchTableViewCell") } // MARK: - 开起和关闭tableView编辑状态 @IBAction func onClickEdit(sender: AnyObject) { self.tableView.setEditing(!self.tableView.editing, animated: true) } // MARK: 样式展示 @IBAction func onClickSearch(sender: AnyObject) { let handler: ((UIAlertAction) -> Void) = { (action: UIAlertAction) -> Void in self.cellStyle = YJCellStyle(title: action.title!) self.tableView.reloadData() } let alertController = UIAlertController(title: "样式展示", message: nil, preferredStyle: UIAlertControllerStyle.ActionSheet) alertController.addAction(UIAlertAction(title: YJCellStyle.Style.title(), style: .Default, handler: handler)) alertController.addAction(UIAlertAction(title: YJCellStyle.SelectionStyle.title(), style: .Default, handler: handler)) alertController.addAction(UIAlertAction(title: YJCellStyle.AccessoryType.title(), style: .Default, handler: handler)) alertController.addAction(UIAlertAction(title: YJCellStyle.SeparatorStyle.title(), style: .Default, handler: { (action: UIAlertAction) -> Void in self.tableViewCellWithSeparatorStyle() })) alertController.addAction(UIAlertAction(title: YJCellStyle.ManagingContentIndentation.title(), style: .Default, handler: handler)) alertController.addAction(UIAlertAction(title: YJCellStyle.SwitchTableViewCell.title(), style: .Default, handler: handler)) alertController.addAction(UIAlertAction(title: "取消", style: .Cancel, handler: nil)) self.presentViewController(alertController, animated: true, completion: nil) } // MARK: - Table view data source override func numberOfSectionsInTableView(tableView: UITableView) -> Int { return 2 } override func tableView(tableView: UITableView, numberOfRowsInSection section: Int) -> Int { var row = 0 switch self.cellStyle { case YJCellStyle.Style, YJCellStyle.SelectionStyle, YJCellStyle.SwitchTableViewCell: row = 4 case YJCellStyle.AccessoryType, YJCellStyle.ManagingContentIndentation: row = 5 default: row = 0 } return row } override func tableView(tableView: UITableView, cellForRowAtIndexPath indexPath: NSIndexPath) -> UITableViewCell { switch self.cellStyle { case YJCellStyle.SelectionStyle: return self.tableViewCellWithSelectionStyle(tableView, cellForRowAtIndexPath: indexPath) case YJCellStyle.AccessoryType: return self.tableViewCellWithAccessoryType(tableView, cellForRowAtIndexPath: indexPath) case YJCellStyle.ManagingContentIndentation: return self.tableViewCellWithManagingContentIndentation(tableView, cellForRowAtIndexPath: indexPath) case YJCellStyle.SwitchTableViewCell: return self.tableViewCellWithSwitch(tableView, cellForRowAtIndexPath: indexPath) default: self.tableViewCellWithStyle(tableView, cellForRowAtIndexPath: indexPath) } return self.tableViewCellWithStyle(tableView, cellForRowAtIndexPath: indexPath) }}报红错的代码可自行注释,会在以后实现相关方法。运行项目看到如下效果。
3 实战演练
3.1 UITableViewCellStyle
系统自带的Cell有四种样式,使用的枚举UITableViewCellStyle。
func tableViewCellWithStyle(tableView: UITableView, cellForRowAtIndexPath indexPath: NSIndexPath) -> UITableViewCell { var cell: UITableViewCell! switch indexPath.row { case 0: cell = UITableViewCell(style: UITableViewCellStyle.Default, reuseIdentifier: nil) cell.textLabel?.text = "Default" // 标题 case 1: cell = UITableViewCell(style: UITableViewCellStyle.Value1, reuseIdentifier: nil) cell.textLabel?.text = "Value1" // 标题 case 2: cell = UITableViewCell(style: UITableViewCellStyle.Value2, reuseIdentifier: nil) cell.textLabel?.text = "Value2" // 标题 default: cell = UITableViewCell(style: UITableViewCellStyle.Subtitle, reuseIdentifier: nil) cell.textLabel?.text = "Subtitle" // 标题 } cell.imageView?.image = UIImage(named: "qq") // 图片 cell.detailTextLabel?.text = "UITableViewCellStyle" // 描述 return cell}运行项目查看效果图。

3.2 UITableViewCellSelectionStyle
UITableViewCellSelectionStyle管理用户点击cell的背景色
func tableViewCellWithSelectionStyle(tableView: UITableView, cellForRowAtIndexPath indexPath: NSIndexPath) -> UITableViewCell { var cell: UITableViewCell! = tableView.dequeueReusableCellWithIdentifier("SelectionStyle") if cell == nil { cell = UITableViewCell(style: UITableViewCellStyle.Default, reuseIdentifier: "SelectionStyle") } switch indexPath.row { case 0: cell.selectionStyle = UITableViewCellSelectionStyle.None cell.textLabel?.text = "None" case 1: cell.selectionStyle = UITableViewCellSelectionStyle.Blue cell.textLabel?.text = "Blue" case 2: cell.selectionStyle = UITableViewCellSelectionStyle.Gray cell.textLabel?.text = "Gray" default: cell.selectionStyle = UITableViewCellSelectionStyle.Default cell.textLabel?.text = "Default" } return cell!}这里使用了复用,可以缓存cell,提高内存利用率以及显示效果。代码为。
var cell: UITableViewCell! = tableView.dequeueReusableCellWithIdentifier("SelectionStyle")if cell == nil { cell = UITableViewCell(style: UITableViewCellStyle.Default, reuseIdentifier: "SelectionStyle")}3.3 UITableViewCellAccessoryType
UITableViewCellAccessoryType可以设置Cell的附属视图。
func tableViewCellWithAccessoryType(tableView: UITableView, cellForRowAtIndexPath indexPath: NSIndexPath) -> UITableViewCell { var cell: UITableViewCell! = tableView.dequeueReusableCellWithIdentifier("AccessoryType") if cell == nil { cell = UITableViewCell(style: UITableViewCellStyle.Default, reuseIdentifier: "AccessoryType") } switch indexPath.row { case 0: cell.accessoryType = UITableViewCellAccessoryType.None // 右变的小图标 cell.textLabel?.text = "None" case 1: cell.accessoryType = UITableViewCellAccessoryType.DisclosureIndicator cell.textLabel?.text = "DisclosureIndicator" case 2: cell.accessoryType = UITableViewCellAccessoryType.DetailDisclosureButton cell.textLabel?.text = "DetailDisclosureButton" case 3: cell.accessoryType = UITableViewCellAccessoryType.Checkmark cell.textLabel?.text = "Checkmark" default: cell.accessoryType = UITableViewCellAccessoryType.DetailButton cell.textLabel?.text = "DetailButton" } cell.editingAccessoryType = cell.accessoryType // 编辑模式下的小图标,默认.None return cell!}效果图

3.4 UITableViewCellSeparatorStyle
UITableViewCellSeparatorStyle就是设置Cell上下的横线,你还可以通过tableView.separatorColor设置横线的颜色。
func tableViewCellWithSeparatorStyle() { /* public enum UITableViewCellSeparatorStyle : Int { case None case SingleLine case SingleLineEtched // This separator style is only supported for grouped style table views currently } */ let alertController = UIAlertController(title: "UITableViewCellSeparatorStyle", message: nil, preferredStyle: UIAlertControllerStyle.ActionSheet) alertController.addAction(UIAlertAction(title: "None", style: UIAlertActionStyle.Default, handler: { (action: UIAlertAction) -> Void in self.tableView.separatorStyle = UITableViewCellSeparatorStyle.None })) alertController.addAction(UIAlertAction(title: "SingleLine", style: UIAlertActionStyle.Default, handler: { (action: UIAlertAction) -> Void in self.tableView.separatorStyle = UITableViewCellSeparatorStyle.SingleLine self.tableView.separatorColor = UIColor.redColor() // 可修改线条颜色 })) alertController.addAction(UIAlertAction(title: "SingleLineEtched", style: UIAlertActionStyle.Default, handler: { (action: UIAlertAction) -> Void in self.tableView.separatorStyle = UITableViewCellSeparatorStyle.SingleLineEtched })) self.presentViewController(alertController, animated: true, completion: nil)}3.5 管理内容缩进
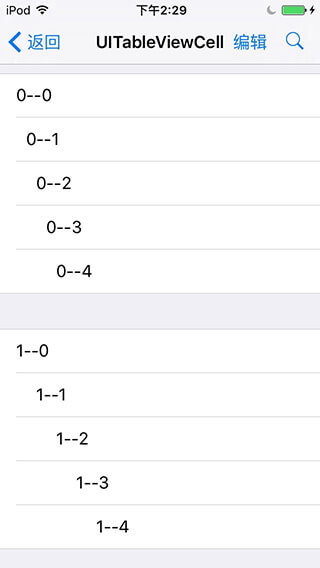
cell中的内容也是可以缩进的,如同目录一样。
func tableViewCellWithManagingContentIndentation(tableView: UITableView, cellForRowAtIndexPath indexPath: NSIndexPath) -> UITableViewCell { var cell: UITableViewCell! = tableView.dequeueReusableCellWithIdentifier("MCIndentation") if cell == nil { cell = UITableViewCell(style: UITableViewCellStyle.Default, reuseIdentifier: "MCIndentation") } cell.textLabel?.text = "\(indexPath.section)--\(indexPath.row)" cell.indentationLevel = indexPath.row // 缩进的级别 cell.indentationWidth = 10.0 * CGFloat(indexPath.section+1) // 缩进的基数,默认10.0 cell.shouldIndentWhileEditing = false // 编辑模式是否缩进,默认true return cell!}效果图
3.6 自定义Cell
大多数情况下,系统的Cell无法满足我们的业务需求。我们会自定义Cell,自定义Cell有两种主要的方式:一种是全代码编写;一种是通过Xib定制。这里我们使用Xib定制。
3.6.1 xib视图

3.6.2 YJSwitchTableViewCell
//// YJSwitchTableViewCell.swift// UI//// CSDN:http://blog.csdn.net/y550918116j// GitHub:https://github.com/937447974/Blog//// Created by yangjun on 15/12/16.// Copyright © 2015年 阳君. All rights reserved.//import UIKitclass YJSwitchTableViewCell: UITableViewCell { /// 标题 @IBOutlet weak var titleLabel: UILabel! /// 按钮 @IBOutlet weak var yjSwitch: UISwitch! /// cell的位置 var indexPath: NSIndexPath? /// 闭包回调 var handler: ((YJSwitchTableViewCell) -> Void)? override func awakeFromNib() { super.awakeFromNib() self.selectionStyle = .None // 点击无颜色变化 } @IBAction func onClickSwitch(sender: AnyObject) { self.handler?(self) }}这里使用了handler闭包回调
3.6.3 界面展示
首先注册cell。
let nib = UINib(nibName: "YJSwitchTableViewCell", bundle: nil)self.tableView.registerNib(nib, forCellReuseIdentifier: "YJSwitchTableViewCell")这样就可以直接在缓存中提取cell了,如果是全代码自定义Cell可以使用。
public func registerClass(cellClass: AnyClass?, forCellReuseIdentifier identifier: String)注册Cell。
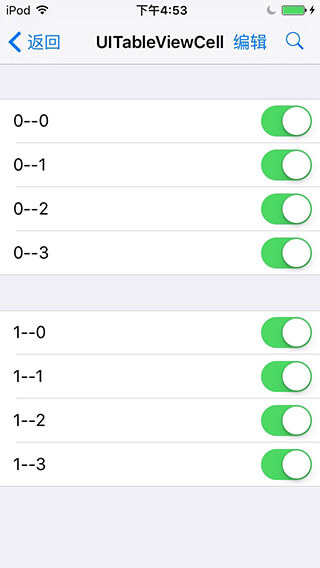
接下来在YJTableViewCellTVC实现func tableViewCellWithSwitch(tableView: UITableView, cellForRowAtIndexPath indexPath: NSIndexPath) -> UITableViewCell方法。
func tableViewCellWithSwitch(tableView: UITableView, cellForRowAtIndexPath indexPath: NSIndexPath) -> UITableViewCell { // 注册的cell可直接提取 let cell = tableView.dequeueReusableCellWithIdentifier("YJSwitchTableViewCell") as! YJSwitchTableViewCell cell.titleLabel.text = "\(indexPath.section)--\(indexPath.row)" cell.indexPath = indexPath // 监听 cell.handler = { (cell: YJSwitchTableViewCell) -> Void in print("\(cell.yjSwitch.on):\(indexPath.section)--\(indexPath.row)") } return cell }运行项目查看效果图。点击相关按钮也可以在控制台看见打印的数据。
其他
源代码
Swift
参考资料
UITableViewCell Class Reference
文档修改记录
版权所有
CSDN:http://blog.csdn.net/y550918116j
GitHub:https://github.com/937447974/Blog
- UITableViewCell
- UITableViewCell
- UITableViewCell
- UITableViewCell
- UITableViewCell
- UITableViewCell
- UITableViewCell
- uitableviewcell
- UITableviewcell
- UITableViewCell
- UITableViewCell
- UITableViewCell
- UITableViewCell
- UITableViewCell
- UITableViewCell
- UITableViewCell
- UITableViewCell
- UITableViewCell
- 将树形菜单拼接为名称+路径
- gdb 调试PHP
- 【Linux学习篇】The Windows connection Linux question
- phantomjs: error while loading shared libraries: libfreetype.so.6
- php部署ueditor上传图片返回未知错误(error 6)
- UITableViewCell
- TMS项目过程小结001
- iOS开发swift如何将字符串生成mac的md5
- C#使用私钥进行RSA加密
- 为什么使用Python, Python应用场景 特点
- centos 7 安装配置ELK
- 页面中设置IE浏览器的文档模式
- 深入理解javascript严格模式(Strict Mode)
- 大大