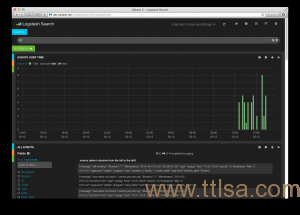
Logstash
来源:互联网 发布:java web项目开发案例 编辑:程序博客网 时间:2024/06/09 23:48
Logstash是一个开源的日志管理工具。
项目地址:http://logstash.net/
Logstash安装使用以下组件:
- Logstash
- Elasticsearch
- Redis
- Nginx
- Kibana
服务端:
- fqdn: dev.kanbier.lan (should be resolvable!)
- ip: 10.37.129.8
安装所需的软件
作者更喜欢使用RPM包来安装软件,要注意版本号,不要去追求时髦用最新的最伟大的,Elasticsearch的版本应该匹配Logstash的版本。
$ vi/etc/yum.repos.d/logstash.repo[logstash-1.4]name=logstash repository for1.4.x packagesbaseurl=http://packages.elasticsearch.org/logstash/1.4/centosgpgcheck=1gpgkey=http://packages.elasticsearch.org/GPG-KEY-elasticsearchenabled=1$ vi/etc/yum.repos.d/elasticsearch.repo[elasticsearch-1.0]name=Elasticsearch repository for1.0.x packagesbaseurl=http://packages.elasticsearch.org/elasticsearch/1.0/centosgpgcheck=1gpgkey=http://packages.elasticsearch.org/GPG-KEY-elasticsearchenabled=1$ vi/etc/yum.repos.d/nginx.repo[nginx]name=nginx repobaseurl=http://nginx.org/packages/centos/$releasever/$basearch/gpgcheck=0enabled=1$ rpm -Uvh http://mirror.1000mbps.com/fedora-epel/6/i386/epel-release-6-8.noarch.rpm$ yum -y installelasticsearch redis nginx logstash启用Kibana
$ wget https://download.elasticsearch.org/kibana/kibana/kibana-3.0.0.tar.gz$ tar-xvzf kibana-3.0.0.tar.gz$ mvkibana-3.0.0 /usr/share/kibana3我们需要告诉Kibana在哪里可以找到elasticsearch。打开配置文件并修改elasticsearch参数:
$ vi/usr/share/kibana3/config.js搜索“elasticsearch”参数,并对其进行修改以适应您的环境:
elasticsearch: "http://dev.kanbier.lan:9200",您还可以修改default_route参数,默认打开logstash仪表板而不是Kibana欢迎页面:
default_route : '/dashboard/file/logstash.json',通过web界面访问:
$ wget https://raw.github.com/elasticsearch/kibana/master/sample/nginx.conf$ mvnginx.conf /etc/nginx/conf.d/$ vi/etc/nginx/conf.d/nginx.confserver_name dev.kanbier.lan;nginx配置如下:
## Nginx proxy for Elasticsearch + Kibana## In this setup, we are password protecting the saving of dashboards. You may# wish to extend the password protection to all paths.## Even though these paths are being called as the result of an ajax request, the# browser will prompt for a username/password on the first request## If you use this, you'll want to point config.js at http://FQDN:80/ instead of# http://FQDN:9200#server { listen *:80 ; server_name kibana.myhost.org; access_log /var/log/nginx/kibana.myhost.org.access.log; location / { root /usr/share/kibana3; index index.html index.htm; } location ~ ^/_aliases$ { proxy_pass http://127.0.0.1:9200; proxy_read_timeout 90; } location ~ ^/.*/_aliases$ { proxy_pass http://127.0.0.1:9200; proxy_read_timeout 90; } location ~ ^/_nodes$ { proxy_pass http://127.0.0.1:9200; proxy_read_timeout 90; } location ~ ^/.*/_search$ { proxy_pass http://127.0.0.1:9200; proxy_read_timeout 90; } location ~ ^/.*/_mapping { proxy_pass http://127.0.0.1:9200; proxy_read_timeout 90; } # Password protected end points location ~ ^/kibana-int/dashboard/.*$ { proxy_pass http://127.0.0.1:9200; proxy_read_timeout 90; limit_except GET { proxy_pass http://127.0.0.1:9200; auth_basic"Restricted"; auth_basic_user_file /etc/nginx/conf.d/kibana.myhost.org.htpasswd; } } location ~ ^/kibana-int/temp.*$ { proxy_pass http://127.0.0.1:9200; proxy_read_timeout 90; limit_except GET { proxy_pass http://127.0.0.1:9200; auth_basic"Restricted"; auth_basic_user_file /etc/nginx/conf.d/kibana.myhost.org.htpasswd; } }}配置redis
$ vi/etc/redis.confbind 10.37.129.8配置Logstash
可以使用Logstash文档上的logstash-complex.conf文件,并不是很负责,包含:
- 从 /var/log目录读取文件
- 打开5544端口以启用直接接收远程系统日志消息
- 告诉logstash,利用本身的elasticsearch而不是嵌入的
$ vi /etc/logstash/conf.d/logstash-complex.confinput { file { type => "syslog" # Wildcards work, here <img src="http://www.denniskanbier.nl/blog/wp-includes/images/smilies/icon_smile.gif"alt=":)" class="wp-smiley"> path => ["/var/log/*.log", "/var/log/messages","/var/log/syslog" ] sincedb_path =>"/opt/logstash/sincedb-access" } redis { host => "10.37.129.8" type => "redis-input" data_type =>"list" key => "logstash" } syslog { type => "syslog" port => "5544" }} filter { grok { type => "syslog" match => ["message", "%{SYSLOGBASE2}"] add_tag => ["syslog", "grokked"] }} output { elasticsearch { host =>"dev.kanbier.lan" }}启动服务
$ service redis start; chkconfig redis on$ service elasticsearch start; chkconfig --add elasticsearch; chkconfig elasticsearch on$ service logstash start; chkconfig logstash on$ service nginx start; chkconfig nginx on对于rsyslog现在你可以将这些行添加到/ etc/ rsyslog.conf
# ### begin forwarding rule #### The statement between the begin ... end define a SINGLE forwarding# rule. They belong together, do NOT split them. If you create multiple# forwarding rules, duplicate the whole block!# Remote Logging (we use TCP for reliable delivery)## An on-disk queue is created for this action. If the remote host is# down, messages are spooled to disk and sent when it is up again.$WorkDirectory /var/lib/rsyslog # where to place spool files$ActionQueueFileName fwdRule1 # unique name prefix for spool files$ActionQueueMaxDiskSpace 1g # 1gb space limit (use as much as possible)$ActionQueueSaveOnShutdown on # save messages to disk on shutdown$ActionQueueType LinkedList # run asynchronously$ActionResumeRetryCount -1 # infinite retries if host is down# remote host is: name/ip:port, e.g. 192.168.0.1:514, port optional*.* @@10.37.129.8:5544# ### end of the forwarding rule ###如果有防火墙需要放开这些端口:
- port 80 (for the web interface)
- port 5544 (to receive remote syslog messages)
- port 6379 (for the redis broker)
- port 9200 (so the web interface can access elasticsearch)

0 0
- Logstash
- LogStash
- Logstash
- logstash
- logstash
- Logstash
- logstash安装
- 安装logstash
- Logstash+syslog
- Logstash-1
- LogStash入门教程
- 安装logstash
- ELK -Logstash
- logstash安装
- logstash部署
- 安装Logstash
- logstash Codec
- logstash match
- Oracle 备份脚本
- linux的tar命令压缩和解压缩文件
- SAP中负数的表示增强 负号从数字后更改到数字前面
- LeetCode中Count Primes的java实现
- 4.1 eclipse -android 中文乱码的解决
- Logstash
- Oracle LISTAGG排重方法
- JAVA反射机制
- ios如何通过storyboard获得视图控制器
- 如何高效的将word文档转换成PDF文档
- 文件操作设定路径的一些注意
- BZOJ 1123: [POI2008]BLO
- mysql connector c++ release 版本控制台编译问题
- 搜狗输入法全/半角快速切换


