android自定义控件(五) 自定义组合控件
来源:互联网 发布:js数据是否为json格式 编辑:程序博客网 时间:2024/06/10 17:14
转自http://www.cnblogs.com/hdjjun/archive/2011/10/12/2209467.html 代码为自己编写
目标:实现textview和ImageButton组合,可以通过Xml设置自定义控件的属性。
通过代码或者通过xml设置自定义控件的属性
1.控件布局:以Linearlayout为根布局,一个TextView,一个ImageButton。Xml代码
< ?xml version="1.0" encoding="utf-8"?> < LinearLayout xmlns:Android="http://schemas.android.com/apk/res/android" android:layout_width="fill_parent" android:layout_height="fill_parent" android:gravity="center_vertical"> < TextView android:layout_height="wrap_content" android:id="@+id/text1" android:layout_width="wrap_content">< /TextView> < ImageButton android:layout_width="wrap_content" android:layout_height="wrap_content" android:id="@+id/btn1">< /ImageButton> < /LinearLayout>2.自定义控件代码,从LinearLayout继承:
Java代码
public class ImageBtnWithText extends LinearLayout { } public ImageBtnWithText(Context context) { this(context, null); } public ImageBtnWithText(Context context, AttributeSet attrs) { super(context, attrs); //在构造函数中将Xml中定义的布局解析出来。 LayoutInflater.from(context).inflate(R.layout.imagebtn_with_text, this, true); } }3.在主界面布局xml中使用自定义控件:
Xml代码
< com.demo.widget2.ImageBtnWithText android:id="@+id/widget" android:layout_width="fill_parent" android:layout_height="fill_parent" />
即使用完整的自定义控件类路径:com.demo.widget2.ImageBtnWithText定义一个元素。
运行可以看到控件已经能够被加载到界面上。
4.给按钮设置图片和文本
如果图片是固定不变的,那么直接在控件布局中设置ImageButton的src属性即可。
4.1通过Java代码设置,在控件代码中提供函数接口:
Java代码
public void setButtonImageResource(int resId) { mBtn.setImageResource(resId); } public void setTextViewText(String text) { mTv.setText(text); }然后再在主界面的onCreate()通过函数调用设置即可。
4.2通过Xml设置属性
4.2.1首先定义Xml可以设置的属性集合,在values下创建attrs.xml,文件名可随意,一般都叫attrs.xml
Xml代码
< ?xml version="1.0" encoding="utf-8"?> < resources> < declare-styleable name="ImageBtnWithText"> < attr name="android:text"/> < attr name="android:src"/> < /declare-styleable> < /resources>
属性集合名字:ImageBtnWithText,自己可根据实际来定义;
集合中包含的属性列表,每行一个属性。
4.2.2修改自定义控件实现代码,以获取xml中定义的属性
Java代码
TypedArray a = context.obtainStyledAttributes(attrs, R.styleable.ImageBtnWithText); CharSequence text = a.getText(R.styleable.ImageBtnWithText_android_text); if(text != null) mTv.setText(text); Drawable drawable = a.getDrawable(R.styleable.ImageBtnWithText_android_src); if(drawable != null) mBtn.setImageDrawable(drawable); a.recycle();
首先通过context.obtainStyledAttributes获得所有属性数组;
然后通过TypedArray类的getXXXX()系列接口获得相应的值。
4.2.3在主界面布局中设置自定义控件的属
android:text="ABC" android:src="@drawable/icon
4.3自定义名称属性:
在4.2中使用的属性名是Android系统命名空间的,都以android开头,比如android:text等。
实际开发中会自定义一些属性名,这些属性名仍然定义在4.2.1提到的attrs.xml中:
4.3.1定义属性名
Xml代码
< attr name="appendText" format="string"/>
和直接使用系统的attr不同的是要增加一个format属性,说明此属性是什么格式的。format可选项可参见注1
4.3.2使用自定义属性
Xml代码
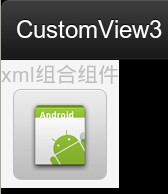
< ?xml version="1.0" encoding="utf-8"?> < LinearLayout xmlns:android="http://schemas.android.com/apk/res/android" xmlns:myspace="http://schemas.android.com/apk/res/com.demo.customwidget" android:orientation="vertical" android:layout_width="fill_parent" android:layout_height="fill_parent"> < com.demo.widget2.ImageBtnWithText android:text="ABC" android:src="@drawable/icon" android:id="@+id/widget" android:layout_width="fill_parent" android:layout_gravity="center" android:layout_height="fill_parent" myspace:appendText="123456"> < /com.demo.widget2.ImageBtnWithText> < /LinearLayout>效果图
下载地址 http://download.csdn.net/detail/ethan_xue/4109870
- android自定义控件(五) 自定义组合控件
- android自定义控件(五) 自定义组合控件
- android自定义控件(五) 自定义组合控件
- android自定义控件(五) 自定义组合控件
- android自定义控件(五) 自定义组合控件
- android自定义控件(五) 自定义组合控件
- android自定义控件(五) 自定义组合控件
- Android自定义组合控件
- android自定义组合控件
- Android自定义组合控件
- android组合自定义控件
- android 自定义组合控件
- android 自定义组合控件
- android 自定义组合控件
- Android自定义组合控件
- android自定义组合控件
- Android 自定义组合控件
- android自定义组合控件
- Linux常用C函数—字符串转换
- LaTeX中文排版(使用XeTeX)
- Linux初步学习 (六)
- C#Winform做一个简单的呼叫中心的心得
- 【状态压缩DP】炮兵阵地
- android自定义控件(五) 自定义组合控件
- C++引用和C语言指针调用函数
- 用 OData Service 访问云数据
- 实验5-1 while循环结构
- [ZZ]ServletConfig说明和用法
- C++库大全【转】
- 数组a,长度为n(索引为0至n-1)。现要求更新数组的各个元素,使新数组的第i个元素等于原数组中除第i个元素之外各元素之积
- 专业的LaTeX: 在Linux下编写高质量的文档
- Matlab textread函数详解